Exploring Nested Routes and Layouts

Niraj Chaurasiya
01 June 2024

Table of Contents
What are Nested Routes?
Nested routing might sound complicated, but it's a powerful way to organize and navigate web applications. Let's break it down into easy-to-understand pieces.
Imagine a project management tool with these sections:
For example:
  Home: /
  Dashboard: /dashboard
  Profile: /dashboard/profile
  Settings: /dashboard/settings
In the above code snippet, the home i.e. /, is the root URL of the website. The dashboard URL i.e. /dashboard, serves as a parent route, and within this parent, you have nested routes such as profile and settings.
These nested routes can be visualized as sub-sections or pages that belong to the main section, helping to keep the navigation organized. For example, the Profile and Settings routes are both nested under the Dashboard route, creating a hierarchical structure.
This approach allows for a more intuitive and structured navigation experience, making it easier for users to find and manage related content within the application.
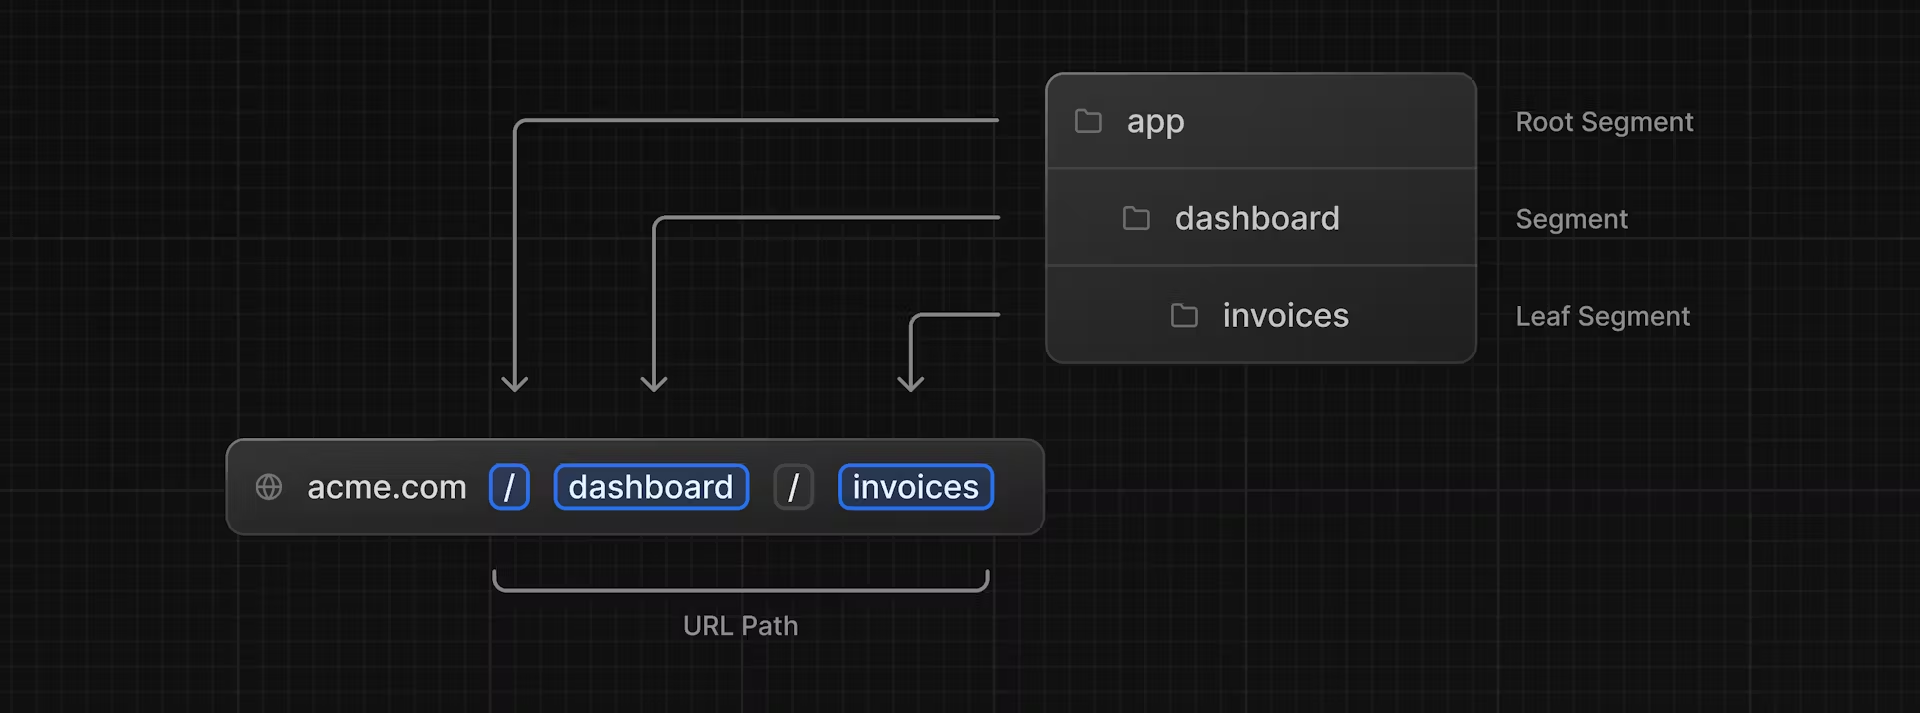
Next.js uses file-system routing where folders are used to create nested routes. Each folder represents a route segment that maps to a URL segment.
Below is the image!
You can create separate UIs for each route using layout.tsx and page.tsx files. page.tsx is a special Next.js file that exports a React component, and it's required for the route to be accessible.
In your application, you already have a page file: /app/page.tsx - this is the home page associated with the route /. To create a nested route, you can nest folders inside each other and add page.tsx files inside them.
For example:
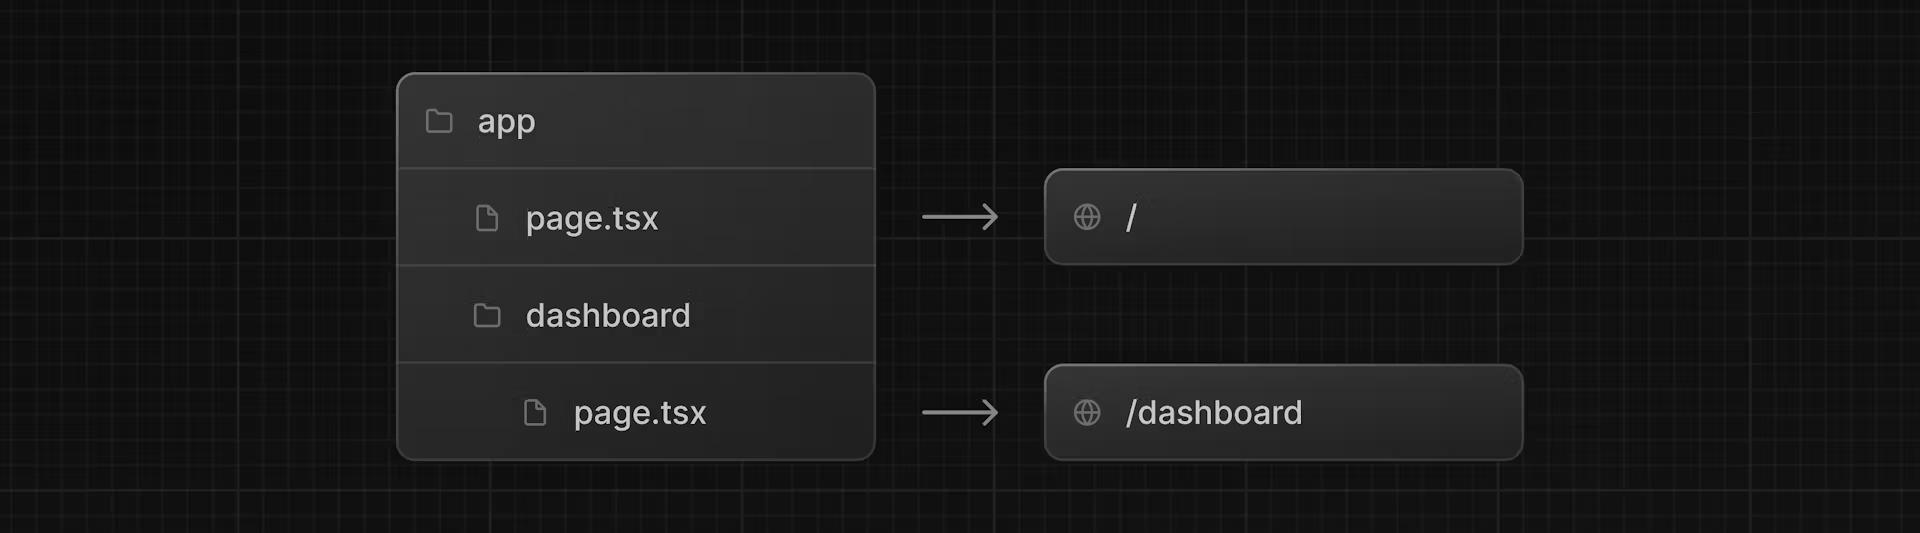
/app/dashboard/page.tsx is associated with the /dashboard path.
Let's create the page to see how it works!
Implementing Nested Routes on NextJS 14!
First of all, we will create a dashboard route i.e /dashboard.
For that we need to go inside the root folder i.e. app folder in our NextJS 14 app, and we will create a dashboard folder.
Then, create a new page.tsx file inside the dashboard folder with the following content:
 export default function Page() {
  return <p>Dashboard Page</p>;
}
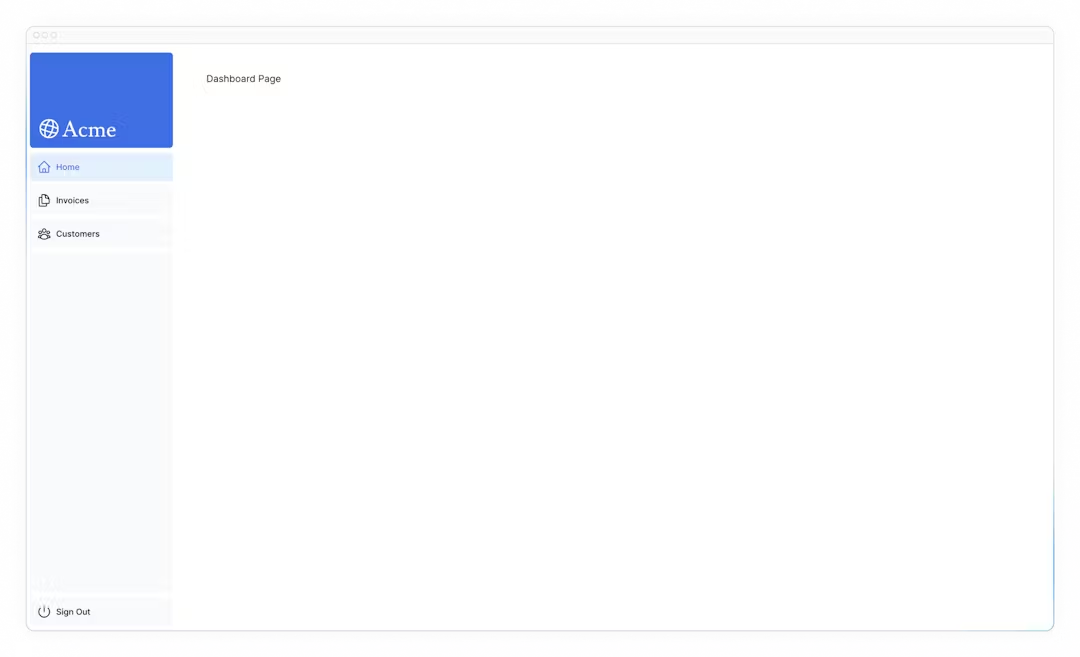
Now, make sure that the development server is running and visit http://localhost:3000/dashboard.
You should see the “Dashboard Page“ text.
This is how you can create different pages in Next.js: create a new route segment using a folder, and add a page file inside it.
Practice: Creating the dashboard pages
Lets now practice it by creating two more folders.
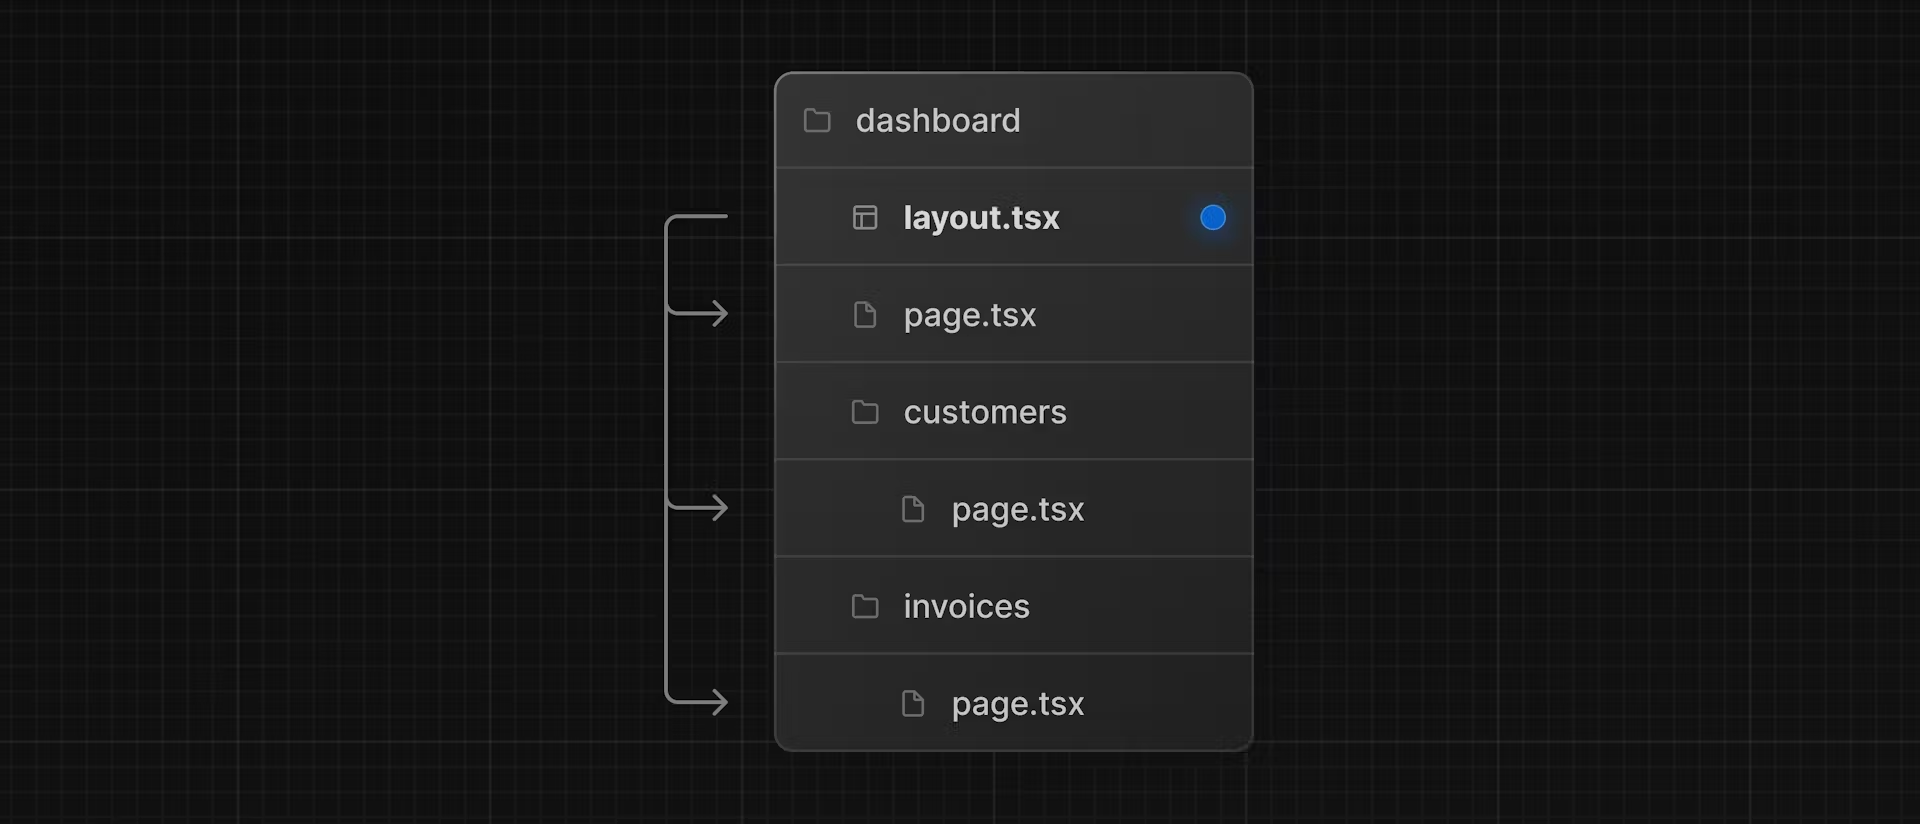
Firstly, we will create two more folders inside the dashboard folder i.e. Customers and Invoices
Secondly, we will create a file, page.tsx, in each folder.
The image belows shows how our folders look like once we these create two folders.
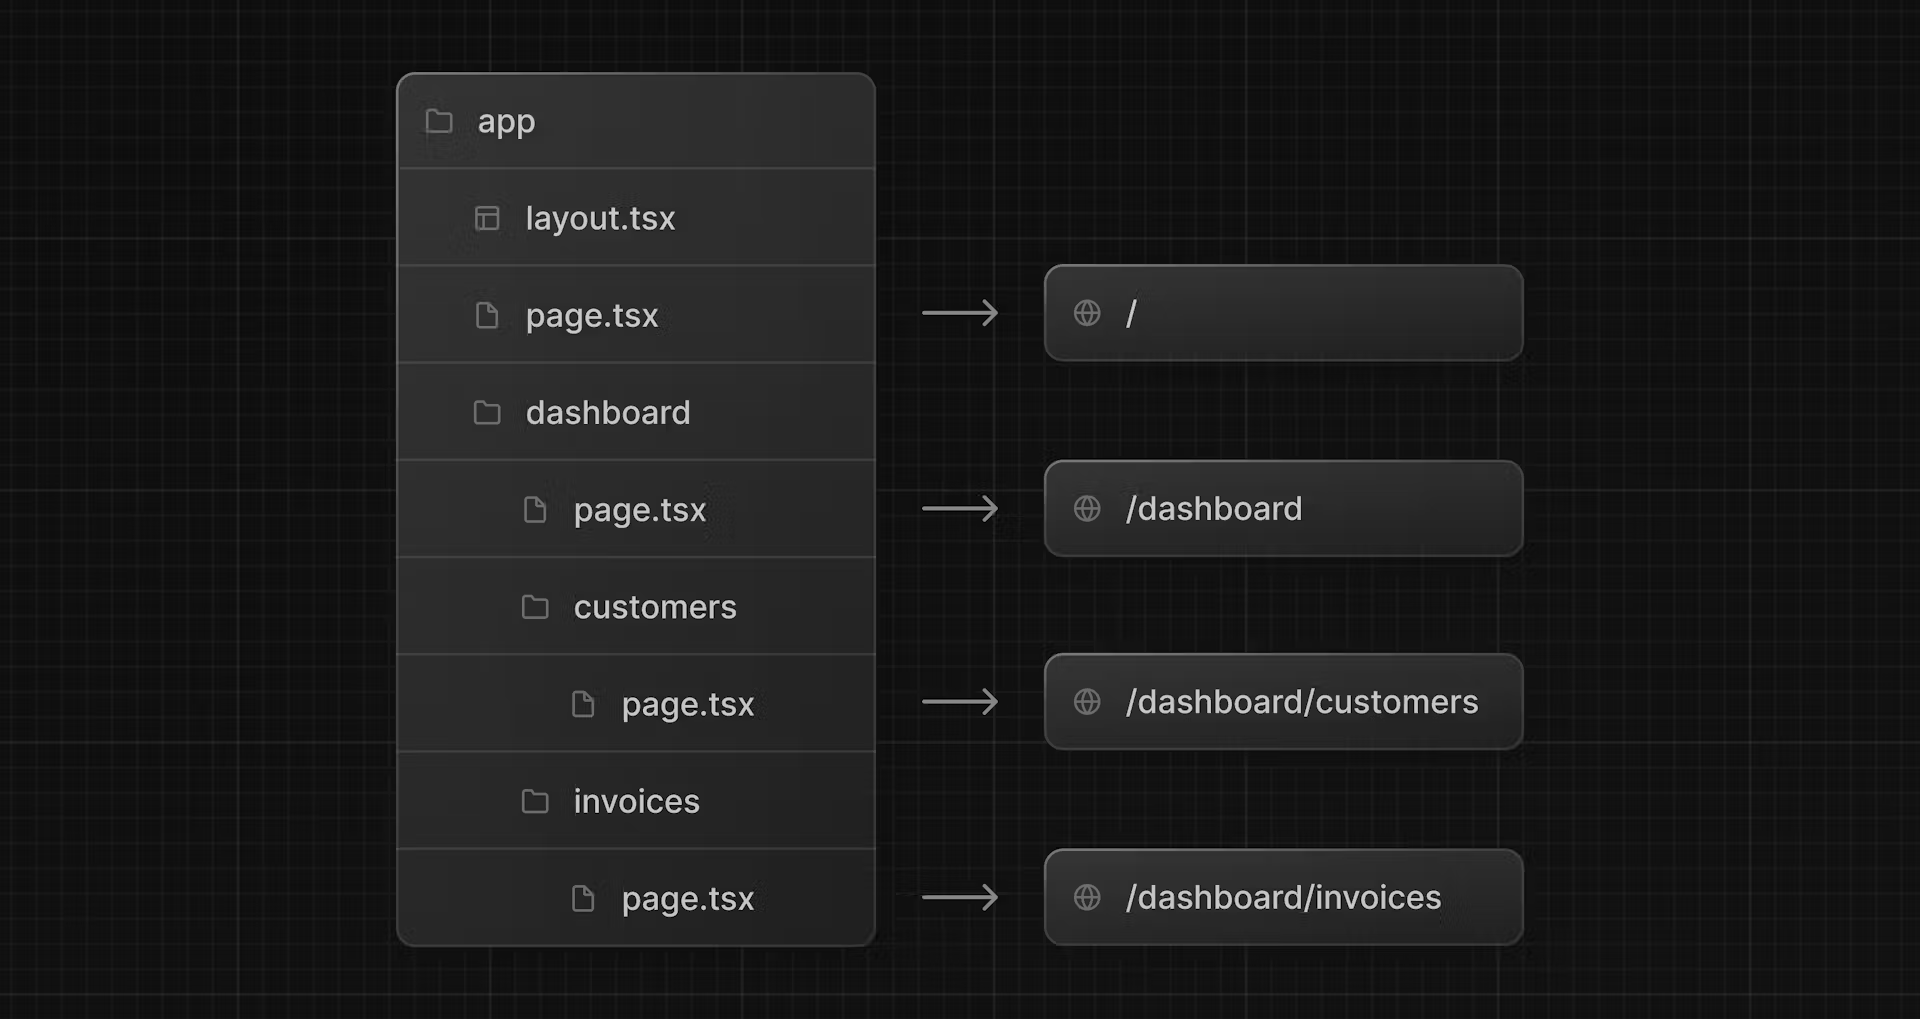
Now, when you visit http://localhost:3000/dashboard/customers, it should shows Customers Page
Similarly, when you visit http://localhost:3000/dashboard/invoices, it should shows Invoices Page
What is Layout?
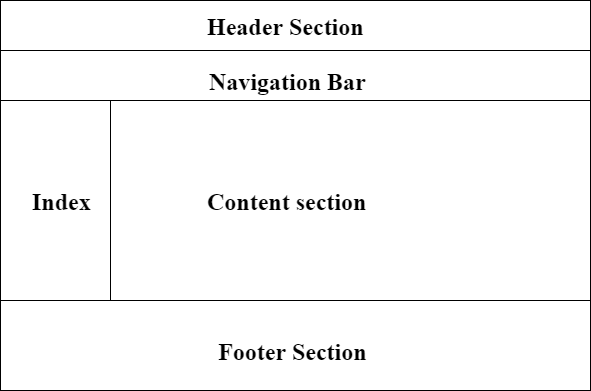
The term layout refers to the way something is designed, arranged, or laid out. In written text, this is usually how visual elements, such as pictures, fonts, and headings, are presented on the page.
For eg:
Just like, In NextJS 14, you can use a special layout.tsx file to create UI that is shared between multiple pages.
Creating the Dashboard Layout!
So, Let's create a layout for the dashboard pages!
Inside the /dashboard folder, add a new file called layout.tsx and paste the following code:
  import SideNav from '@/app/ui/dashboard/sidenav';

  export default function Layout({ children }: { children: React.ReactNode }) {
    return (
      <div className="flex h-screen flex-col md:flex-row md:overflow-hidden">
        <div className="w-full flex-none md:w-64">
          <SideNav />
        </div>
        <div className="flex-grow p-6 md:overflow-y-auto md:p-12">{children}</div>
      </div>
    );
  }
Lets now understand the code line by line
First of all, we will import SideNav from @/app/ui/dashboard/sidenav.
Remember, any components you import into this file will be part of the layout.
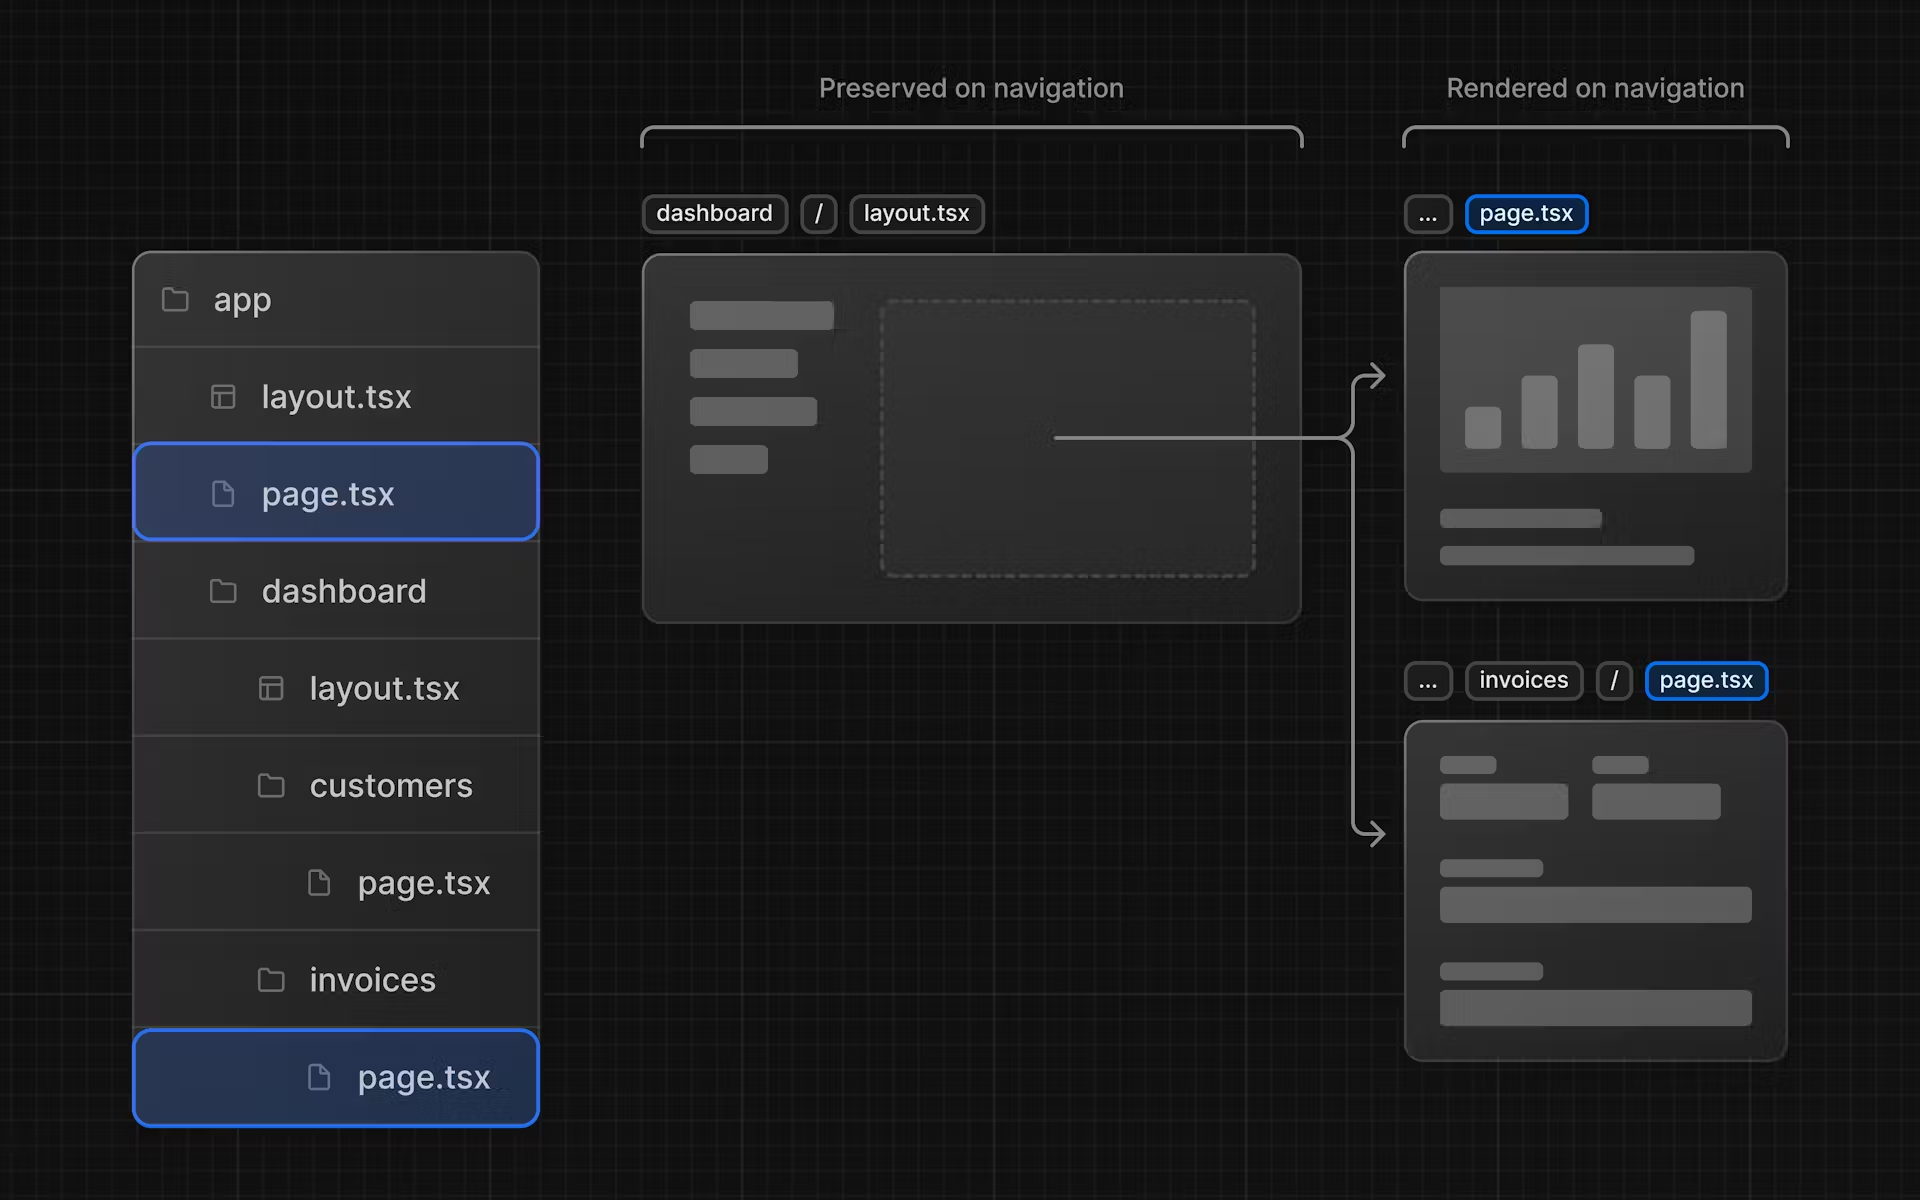
The <Layout /> component receives a children prop. This child can either be a page or another layout. In your case, the pages inside /dashboard will automatically be nested inside a <Layout /> like so:
Now, lets check that everything is working correctly by saving our changes and checking our localhost. We should see the following:
One benefit of using layouts in Next.js is that on navigation, only the page components update while the layout won't re-render.
I hope you are now cleared with Nested Routes and Layouts.
In the next blog, we will solve the issue of page reloading when you visit in any nested layout from the dashboard page.
Follow me on X: https://twitter.com/@loveforrobotics
My YouTube channel link where I share amazing videos like this: https://youtube.com/@niraj.chaurasiya
Video
Tags
routes
nested routes
layout
nextjs 14